Base Makeup

Eyeliner smudging under eyes vs smudge-proof eyeliner result
Base Makeup, Eyeliner Problems, Eyes, Face, Stop Eyeliner Smudging

Stop Eyeliner Smudging

Perfect Eyeliner Hero

How to Stop Eyeliner from Smudging (Causes + Fixes That Work)

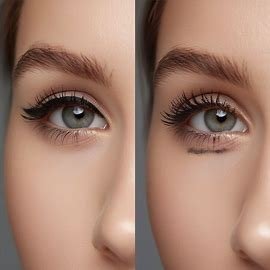
Smudged eyeliner is often caused by oil, moisture, or the wrong formula—but the right techniques can keep it in place all day.

How to Stop Eyeliner from Smudging (Causes + Fixes That Actually Work)

If your eyeliner smudges, fades, or transfers throughout the day, you’re not alone. From oily eyelids to the wrong formula, several factors can cause eyeliner to break down. This guide explains exactly why it happens—and how to fix it for long-lasting, smudge-proof wear.

Why Your Eyeliner Smudges

Oily Eyelids

Excess oil breaks down eyeliner formulas, causing them to smear or fade faster—especially throughout the day.

Watery Eyes

Tears and moisture dissolve eyeliner, particularly near the inner corners and lower lash line.

Wrong Formula

Soft or creamy liners are designed to blend, which makes them more likely to smudge.

No Primer or Base

Applying eyeliner directly onto bare or oily skin makes it harder for the product to stay in place.

How to Stop Eyeliner from Smudging

Prep Your Eyelids

  • Start with clean, oil-free skin
  • Apply primer or concealer
  • Set lightly with powder
Why it works: A dry base helps eyeliner last longer.

Choose the Right Formula

  • Oily lids: waterproof or liquid liner
  • Long wear: gel or waterproof formulas
  • Avoid overly creamy pencils
Tip: Formula choice is key for longevity.

Set Your Eyeliner

  • Use matching eyeshadow
  • Apply with a small brush
Why it works: Setting locks liner in place.

Apply in Thin Layers

  • Start thin
  • Let dry before layering
Why it works: Thick layers smudge more easily.

Avoid High-Moisture Areas

  • Inner corners water easily
  • Lower lash line smudges more

Lock It In

  • Use setting spray
  • Choose long-wear formulas
Why it works: Helps extend wear time.

Best Eyeliner Types to Prevent Smudging

Liquid Eyeliner

Dries quickly and resists smudging. Ideal for sharp lines and long wear.

Gel Eyeliner

Highly pigmented and long-lasting with more control than liquid.

Waterproof Pencil

More resistant than standard pencils while still easy to use.

Common Mistakes That Cause Smudging

  • Skipping primer
  • Applying on oily skin
  • Using overly creamy formulas
  • Applying thick layers
  • Not letting liner dry

Quick Fixes if Your Eyeliner Smudges

  • Clean edges with a cotton swab
  • Set under eyes with powder
  • Blend into a smoky look

Explore More Eyeliner Tips

Learn how to choose the right eyeliner, apply it based on your eye shape, and find the best formulas for your routine.

Back to Eyeliner Guide
Curling mascara brush for lifting lashes for curled, eye-opening effect
Base Makeup, Curling Mascara, Eyes, Face, Mascara

Curling Mascara

Curling

Curling Mascara: Guide, Tips & Best Picks

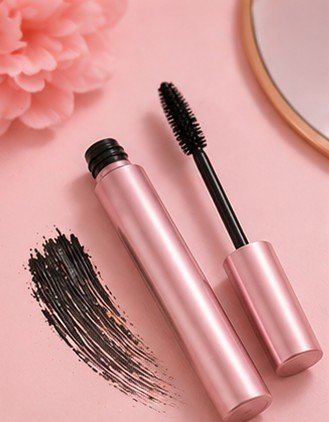
Curling mascara is designed to lift and hold lashes in an upward curl, creating a more open and awake eye appearance. It helps straight or downward-pointing lashes stay lifted throughout the day for a defined, eye-opening effect.

Common Curling Mascara Questions Answered

What is curling mascara?

Curling mascara is designed to lift and curl lashes while holding them in place for a more open, lifted eye look.

Who should use curling mascara?

It’s ideal for straight or downward-pointing lashes that struggle to hold a curl.

Does it actually curl lashes?

Yes — it helps hold and enhance curl, especially when used with a lash curler.

Can I use it without a lash curler?

Yes, but results are stronger when paired with a lash curler.

Is it good for everyday wear?

Yes — it creates a lifted, natural-to-defined lash look suitable for daily use.

Does it add volume too?

Some formulas add light volume, but the main focus is lift and curl.

Does it smudge easily?

Most curling mascaras are designed for long wear and minimal smudging.

What look does it create?

A lifted, eye-opening lash effect with enhanced curl and definition.

Most Searched Curling Mascara Questions

Why won’t my lashes hold a curl?

They may be heavy, straight, or need a better curling technique.

How do I make curl last longer?

Use a lash curler before mascara and apply in thin layers.

Does waterproof mascara hold curl better?

Yes — waterproof formulas often help maintain curl longer.

Can I layer curling mascara?

Yes, but apply lightly to avoid weighing lashes down.

Curling Mascara Application Steps

Step 1: Prep Lashes

  • Start with clean, dry lashes
  • Use a lash curler before applying mascara

Step 2: Apply First Coat

  • Wiggle wand at the base of lashes
  • Pull upward to enhance lift

Step 3: Lock in Curl

  • Hold wand at lash tips briefly
  • Let mascara set slightly

Step 4: Build Definition

  • Add a light second coat if needed
  • Keep layers thin to avoid drooping

Step 5: Finish Look

  • Check curl symmetry
  • Separate lashes if needed

Useful Curling Mascara Tools

  • Lash Curler – Essential for lift
  • Heated Lash Curler – Enhances curl hold
  • Lightweight Mascara Wand – Helps maintain curl

Curling Mascara Tips & Guidance

Best for Lash Types ✨

  • Straight lashes: Helps lift and curl
  • Downward lashes: Opens the eyes
  • Heavy lashes: Maintains structure
  • Short lashes: Creates visible lift

Common Mistakes ⚠️

  • Skipping lash curler
  • Applying too many coats
  • Not letting curl set
  • Using heavy formulas

Where to Apply 📍

  • Upper lashes (focus on lift)
  • Outer corners for eye-opening effect
  • Light application on lower lashes

Choosing the Right Formula 🎯

Lightweight, flexible formulas hold curl best without weighing lashes down.

Curling Mascara Coverage, Finish & Effect Guide

Coverage Levels ✨

  • Light: Natural lift
  • Medium: Visible curl + definition
  • Full: Strong lifted lash effect

Finish Types 💄

  • Natural – soft lifted lashes
  • Defined – structured curl
  • Longwear – all-day hold

Best For ✔

  • Straight lashes
  • Droopy lashes
  • Eye-opening looks

May Not Be Ideal If ⚠

  • You want extreme volume
  • You prefer heavy, dramatic lashes

Pro Tips 💡

  • Always curl before mascara
  • Use thin layers
  • Let each coat set

Still Deciding Which Mascara Is Right for You?

Explore different mascara types to find your perfect match.

Best Curling Mascaras

Maybelline Lash Sensational Waterproof

⭐ 4.6 / 5 from 75k+ reviews

Effect:
Lifted, curled lashes

Benefits:
Holds curl all day

Why we love it:
Great balance of curl and definition.

Buy Now

Benefit Roller Lash

⭐ 4.6 / 5 from 60k+ reviews

Effect:
Curled, separated lashes

Benefits:
Hook ‘n’ roll brush

Why we love it:
Strong curl with clean separation.

Buy Now

LANEIGE Lash Fix Mascara

⭐ 4.5 / 5 from 25k+ reviews

Effect:
Long-lasting curl hold

Benefits:
Lightweight formula

Why we love it:
Perfect for all-day lifted lashes.

Buy Now

Etude Curl Fix Mascara

⭐ 4.7 / 5 from 40k+ reviews

Effect:
Strong curl retention

Benefits:
Smudge-resistant formula

Why we love it:
Excellent for straight lashes.

Buy Now

Length and volume mascara brush for applying formula for longer fuller lashes
Base Makeup, Eyes, Face, Length and Volume Mascara, Mascara

Length and Volume Mascara

Length

Length & Volume Mascara: Guide, Tips & Best Picks

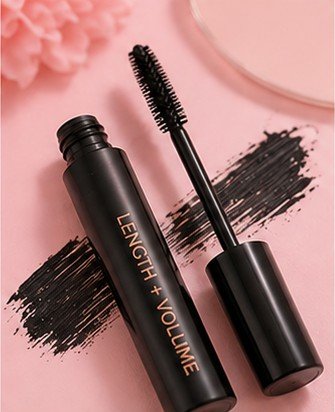
Length & volume mascara is designed to give lashes both visible length and fuller volume in a single formula. It enhances definition while building thickness, making it perfect for a balanced, all-in-one lash look.

Common Length & Volume Mascara Questions Answered

What is length and volume mascara?

It’s a mascara designed to both extend lash length and add fullness for a balanced lash look.

Who should use it?

It’s ideal for anyone who wants both longer and fuller lashes in one product.

Does it really do both?

Yes — it combines lengthening fibers and volumizing formulas for a dual effect.

Is it good for everyday wear?

Yes, it’s versatile enough for natural or bold daily looks.

Does it clump easily?

Not usually, but layering too much can cause buildup.

Can I use it with other mascaras?

Yes — it layers well with curling or waterproof mascaras.

What lash type is it best for?

Perfect for sparse or average lashes that need both lift and fullness.

What look does it create?

A balanced lash look with both visible length and volume.

Most Searched Length & Volume Mascara Questions

Why doesn’t my mascara add both effects?

You may need a dual-formula or layering technique.

How do I get more length and volume?

Apply in layers, focusing on roots first and extending to tips.

Can I layer different mascaras?

Yes — lengthening first, then volumizing works best.

Is primer necessary?

Not required, but it enhances both effects significantly.

Length & Volume Mascara Application Steps

Step 1: Prep Lashes

  • Start with clean lashes
  • Optional: use lash curler or primer

Step 2: Apply Base Coat

  • Wiggle wand at lash roots
  • Build volume from base

Step 3: Extend Length

  • Pull product through lash tips
  • Focus on separation

Step 4: Build Layers

  • Add second coat if needed
  • Let each layer set slightly

Step 5: Finish Look

  • Define lower lashes lightly
  • Separate lashes if needed

Useful Length & Volume Mascara Tools

  • Lash Curler – Enhances lift and shape
  • Lash Comb – Separates lashes
  • Lash Primer – Boosts both effects

Length & Volume Mascara Tips & Guidance

Best for Lash Types ✨

  • Sparse lashes: Adds fullness and length
  • Short lashes: Enhances visibility
  • Straight lashes: Lifts and extends
  • Flat lashes: Builds dimension

Common Mistakes ⚠️

  • Applying too many heavy layers
  • Skipping lash prep
  • Not separating lashes
  • Using dried-out mascara

Where to Apply 📍

  • Upper lashes (full coverage)
  • Outer corners (for lift)
  • Lower lashes (lightly)

Choosing the Right Formula 🎯

Lightweight formulas balance length and volume, while thicker formulas create a more dramatic effect.

Length & Volume Mascara Coverage, Finish & Effect Guide

Coverage Levels ✨

  • Light: Natural enhancement
  • Medium: Balanced length + volume
  • Full: Dramatic lash effect

Finish Types 💄

  • Natural – soft definition
  • Balanced – both length and volume
  • Bold – dramatic lashes

Best For ✔

  • Everyday full lash looks
  • Natural glam makeup
  • Enhancing sparse lashes

May Not Be Ideal If ⚠

  • You want extreme volume only
  • You prefer ultra-light formulas

Pro Tips 💡

  • Apply from root to tip
  • Build slowly in layers
  • Use a lash comb for separation

Still Deciding Which Mascara Is Right for You?

Explore different mascara types to find your perfect match.

Best Length & Volume Mascaras

L’Oréal Lash Paradise

⭐ 4.6 / 5 from 60k+ reviews

Effect:
Length + volume

Benefits:
Soft, buildable formula

Why we love it:
Balanced dramatic lash effect.

Buy Now

Maybelline Sky High Mascara

⭐ 4.7 / 5 from 80k+ reviews

Effect:
Lifted length + volume

Benefits:
Flexible wand for reach

Why we love it:
Great everyday all-in-one mascara.

Buy Now

Too Faced Better Than Sex

⭐ 4.5 / 5 from 55k+ reviews

Effect:
Full dramatic lashes

Benefits:
High-impact formula

Why we love it:
Strong volume with visible length.

Buy Now

Benefit Roller Lash

⭐ 4.6 / 5 from 45k+ reviews

Effect:
Lifted length + light volume

Benefits:
Curls and separates lashes

Why we love it:
Natural but enhanced lash look.

Buy Now

Lengthening mascara brush extending lashes for longer, separated appearance
Base Makeup, Eyes, Face, Lengthening Mascara, Mascara

Lengthening Mascara

Lengthening

Lengthening Mascara: Guide, Tips & Best Picks

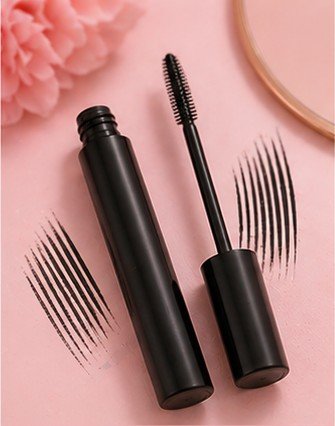
Lengthening mascara is designed to extend the appearance of your lashes by coating and separating each strand for a longer, more defined look. It’s ideal for short or sparse lashes that need extra visible length without heavy volume.

Common Lengthening Mascara Questions Answered

What is lengthening mascara?

Lengthening mascara is designed to make lashes look longer, more defined, and separated for an extended lash effect.

Who should use lengthening mascara?

It’s ideal for short or sparse lashes that need extra visible length and definition.

Does it really make lashes longer?

Yes — it coats and stretches lashes visually to create a longer appearance.

Is it good for everyday use?

Yes, it gives a natural yet enhanced lash look suitable for daily wear.

Does it clump easily?

Not usually, especially if applied in thin layers with a separating wand.

Can I use it with other mascaras?

Yes — it pairs well with volumizing mascara for added impact.

What lash type is it best for?

Best for short, straight, or barely visible lashes.

What look does it create?

A longer, more lifted, and defined lash appearance.

Most Searched Lengthening Mascara Questions

Why doesn’t my mascara lengthen enough?

You may need a thinner formula or a lash primer for better separation.

How do I make lashes look longer?

Apply mascara from root to tip and focus on extending the ends.

Does curling help lengthening mascara?

Yes — curling lashes first enhances the lengthening effect.

Can I layer it?

Yes, but apply light coats to avoid weighing lashes down.

Lengthening Mascara Application Steps

Step 1: Prep Lashes

  • Start with clean lashes
  • Use a lash curler for lift

Step 2: Apply First Coat

  • Wiggle wand from root to tip
  • Focus on separating lashes

Step 3: Extend Tips

  • Lightly pull product through lash ends
  • Enhance visible length

Step 4: Define Lower Lashes

  • Use minimal product
  • Apply carefully for precision

Step 5: Finish Look

  • Let lashes dry fully
  • Separate if needed with a lash comb

Useful Lengthening Mascara Tools

  • Lash Curler – Enhances lift and length
  • Lash Comb – Separates and defines lashes
  • Lengthening Primer – Boosts visible lash length

Lengthening Mascara Tips & Guidance

Best for Lash Types ✨

  • Short lashes: Creates visible extension
  • Straight lashes: Enhances lift and length
  • Sparse lashes: Adds definition
  • Downward lashes: Helps open eyes

Common Mistakes ⚠️

  • Applying too much product
  • Skipping lash curling
  • Not separating lashes
  • Using a thick volumizing wand

Where to Apply 📍

  • Upper lashes (focus on tips)
  • Lower lashes (light application)
  • Outer corners for lift

Choosing the Right Formula 🎯

Thin, fiber-based formulas enhance length, while lightweight formulas keep lashes separated and natural.

Lengthening Mascara Coverage, Finish & Effect Guide

Coverage Levels ✨

  • Light: Natural length
  • Medium: Noticeable extension
  • Full: Dramatic elongated lashes

Finish Types 💄

  • Natural – soft extended look
  • Defined – separated long lashes
  • Length-focused – visible extension

Best For ✔

  • Short or straight lashes
  • Natural makeup looks
  • Eye-opening effects

May Not Be Ideal If ⚠

  • You want dramatic volume
  • You prefer thick lash looks

Pro Tips 💡

  • Always curl lashes first
  • Apply in thin layers
  • Focus on lash tips for extension

Still Deciding Which Mascara Is Right for You?

Explore different mascara types to find your perfect match.

Best Lengthening Mascaras

L’Oréal Telescopic Mascara

⭐ 4.7 / 5 from 70k+ reviews

Effect:
Ultra-lengthened lashes

Benefits:
Precision separating brush

Why we love it:
One of the best for visible lash extension.

Buy Now

Maybelline Lash Sensational Sky High

⭐ 4.6 / 5 from 80k+ reviews

Effect:
Long, lifted lashes

Benefits:
Flexible wand for reach

Why we love it:
Great length with lightweight feel.

Buy Now

Benefit They’re Real Lengthening Mascara

⭐ 4.5 / 5 from 45k+ reviews

Effect:
Extended, separated lashes

Benefits:
Lifts and defines

Why we love it:
Strong length with clean definition.

Buy Now

Clinique High Impact Mascara

⭐ 4.6 / 5 from 35k+ reviews

Effect:
Natural lash extension

Benefits:
Gentle formula

Why we love it:
Perfect for everyday lengthening.

Buy Now

Tubing mascara brush for coating lashes with smudge-proof tube-forming formula
Base Makeup, Eyes, Face, Mascara, Tubing Mascara

Tubing Mascara

Tubing

Tubing Mascara: Guide, Benefits & Best Picks

Tubing mascara coats each lash in tiny, flexible “tubes” instead of traditional pigment. This creates a smudge-proof, flake-free finish that lasts all day and removes easily with warm water.

Common Tubing Mascara Questions Answered

What is tubing mascara?

Tubing mascara forms tiny “tubes” around each lash instead of coating them with pigment.

How is it different from regular mascara?

It doesn’t smudge or flake because it wraps lashes in flexible tubes.

Is tubing mascara waterproof?

It is water-resistant, but removes easily with warm water.

How do you remove tubing mascara?

It slides off with warm water and gentle pressure—no harsh rubbing needed.

Is it good for sensitive eyes?

Yes — it’s often recommended for sensitive eyes due to its gentle removal.

Does it hold curl?

Yes, it helps maintain curl while keeping lashes defined.

Can it add volume and length?

Yes — it provides a natural-looking length and light volume.

What look does it create?

A clean, defined, smudge-free lash look.

Most Searched Tubing Mascara Questions

Why is my tubing mascara not coming off?

It needs warm water to break down the tubes properly.

Does tubing mascara smudge?

No — it resists smudging and flaking throughout the day.

Can I layer tubing mascara?

Yes, but allow each coat to dry before applying another.

Is tubing mascara better than waterproof?

It depends — tubing is easier to remove, waterproof is more rigid.

Tubing Mascara Application Steps

Step 1: Prep Lashes

  • Start with clean, dry lashes
  • Optional: curl lashes before application

Step 2: Apply First Coat

  • Wiggle wand from root to tip
  • Ensure even coating

Step 3: Build Definition

  • Add a second light coat if needed
  • Let each layer set

Step 4: Define Lower Lashes

  • Use tip of wand carefully
  • Apply a minimal amount

Step 5: Set Look

  • Let tubes fully form
  • Avoid touching lashes while drying

Useful Tubing Mascara Tools

  • Lash Curler – Enhances lift
  • Warm Water Cleanser – Removes tubes easily
  • Lash Comb – Keeps lashes separated

Tubing Mascara Tips & Guidance

Best for Lash Types ✨

  • Straight lashes: Holds curl well
  • Sensitive eyes: Gentle removal
  • Oily lids: No smudging
  • Short lashes: Natural lengthening

Common Mistakes ⚠️

  • Using oil-based remover (not needed)
  • Applying too many coats
  • Rubbing lashes harshly
  • Not letting layers dry

Where to Apply 📍

  • Upper lashes
  • Lower lashes (lightly)
  • Focus on even coverage

Choosing the Right Formula 🎯

Light tubing formulas give natural definition, while thicker formulas add more length and structure.

Tubing Mascara Coverage, Finish & Effect Guide

Coverage Levels ✨

  • Light: Natural definition
  • Medium: Defined lashes
  • Full: Strong, structured lashes

Finish Types 💄

  • Natural – clean lash separation
  • Defined – visible length & structure
  • Longwear – smudge-proof tubes

Best For ✔

  • All-day wear without smudging
  • Sensitive eyes
  • Easy makeup removal

May Not Be Ideal If ⚠

  • You want ultra-dramatic volume
  • You prefer thick, heavy formulas

Pro Tips 💡

  • Let each coat dry fully
  • Use warm water for removal
  • Keep application light for best separation

Still Deciding Which Mascara Is Right for You?

Explore different mascara types to find your perfect match.

Best Tubing Mascaras

Blinc Original Tubing Mascara

⭐ 4.6 / 5 from 30k+ reviews

Effect:
Smudge-proof definition

Benefits:
Easy warm-water removal

Why we love it:
Classic tubing formula with clean finish.

Buy Now

L’Oréal Double Extend Tubing Mascara

⭐ 4.5 / 5 from 28k+ reviews

Effect:
Length + definition

Benefits:
Two-step lash extension effect

Why we love it:
Great drugstore tubing option.

Buy Now

KISS Me Heroine Make Mascara

⭐ 4.7 / 5 from 40k+ reviews

Effect:
Long-lasting definition

Benefits:
Water-resistant tubing formula

Why we love it:
Strong hold with clean removal.

Buy Now

Caliray Come Hell or High Water Mascara

⭐ 4.6 / 5 from 25k+ reviews

Effect:
Lightweight tubing lashes

Benefits:
Clean beauty formula

Why we love it:
Natural, modern lash look.

Buy Now

Volumizing mascara brush for applying thickening formula to lashes for fuller look
Base Makeup, Eyes, Face, Mascara, Volumizing Mascara

Volumizing Mascara

Waterproof

Volumizing Mascara: Guide, Tips & Best Picks

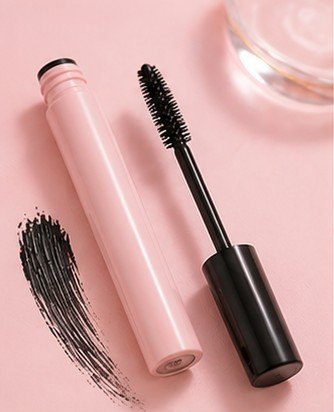
Volumizing mascara is designed to make lashes look thicker, fuller, and more dramatic. It coats each lash to add density and build intensity, making it ideal for sparse or thin lashes that need extra impact.

Common Volumizing Mascara Questions Answered

What is volumizing mascara?

Volumizing mascara is designed to make lashes look fuller, thicker, and more dramatic.

Who should use volumizing mascara?

It’s ideal for those with thin or sparse lashes who want a fuller lash look.

Does it make lashes look thicker?

Yes — it coats lashes with richer formulas to create the appearance of more volume.

Can I use it every day?

Yes — many formulas are suitable for daily wear depending on your desired intensity.

Does it clump easily?

It can if over-applied, but proper layering helps avoid clumping.

Is it good for short lashes?

Yes, but pairing with a lengthening formula can enhance results.

What looks is it best for?

Perfect for bold, dramatic, and full lash looks.

Can I layer it with other mascaras?

Yes — it pairs well with lengthening or curling mascaras.

Most Searched Volumizing Mascara Questions

Why does my mascara look clumpy?

Too many coats or too much product can cause clumping.

How do I get more volume?

Apply in layers and focus on the roots of lashes.

What brush is best for volume?

Thick, dense brushes help deposit more product for fuller lashes.

Can I use primer with volumizing mascara?

Yes — lash primer boosts thickness and hold.

Volumizing Mascara Application Steps

Step 1: Prep Lashes

  • Start with clean lashes
  • Optional: use lash primer

Step 2: Apply at Roots

  • Wiggle wand at lash base
  • Build thickness from the roots

Step 3: Build Layers

  • Add 1–2 coats for volume
  • Let each layer set slightly

Step 4: Define Ends

  • Lightly coat tips
  • Separate with brush if needed

Step 5: Finish Look

  • Apply lightly to lower lashes
  • Clean up any smudges

Useful Volumizing Mascara Tools

  • Lash Primer – Adds extra fullness
  • Lash Comb – Separates lashes
  • Thick Mascara Wand – Maximizes volume

Volumizing Mascara Tips & Guidance

Best for Lash Types ✨

  • Sparse lashes: Adds fullness
  • Thin lashes: Creates thickness
  • Short lashes: Pair with lengthening
  • Flat lashes: Use with curler

Common Mistakes ⚠️

  • Applying too many coats
  • Skipping lash prep
  • Using dried-out mascara
  • Not separating lashes

Where to Apply 📍

  • Upper lashes (focus on roots)
  • Lower lashes (lightly)
  • Center lashes for fullness

Choosing the Right Formula 🎯

Creamy formulas add volume, lightweight formulas reduce clumping, and waterproof versions add hold.

Volumizing Mascara Coverage, Finish & Effect Guide

Coverage Levels ✨

  • Light: Soft fullness
  • Medium: Noticeable volume
  • Full: Dramatic thickness

Finish Types 💄

  • Natural – soft volume
  • Bold – dramatic lashes
  • Waterproof – long-lasting wear

Best For ✔

  • Full lash looks
  • Dramatic makeup styles
  • Enhancing sparse lashes

May Not Be Ideal If ⚠

  • You want very natural definition
  • You prefer lightweight formulas

Pro Tips 💡

  • Layer slowly to avoid clumps
  • Focus on lash roots
  • Use a comb for separation

Still Deciding Which Mascara Is Right for You?

Explore different mascara types to find your perfect match.

Best Volumizing Mascaras

L’Oréal Lash Paradise

⭐ 4.6 / 5 from 60k+ reviews

Effect:
Full volume

Benefits:
Soft, buildable formula

Why we love it:
Creates bold lashes without stiffness.

Buy Now

Too Faced Better Than Sex

⭐ 4.5 / 5 from 50k+ reviews

Effect:
Dramatic volume

Benefits:
Intense pigment

Why we love it:
Perfect for glam looks.

Buy Now

Maybelline Volum’ Express

⭐ 4.6 / 5 from 45k+ reviews

Effect:
Thick lashes

Benefits:
Affordable and effective

Why we love it:
Great everyday volume boost.

Buy Now

Covergirl LashBlast Volume

⭐ 4.6 / 5 from 55k+ reviews

Effect:
Full, separated lashes

Benefits:
Clump-resistant

Why we love it:
Reliable and easy to use.

Buy Now

Waterproof mascara on pink background showing smudge-proof long-lasting formula
Base Makeup, Eyes, Face, Mascara, Waterproof Mascara

Waterproof Mascara

Waterproof

Waterproof Mascara: Complete Guide, Tips & Best Picks

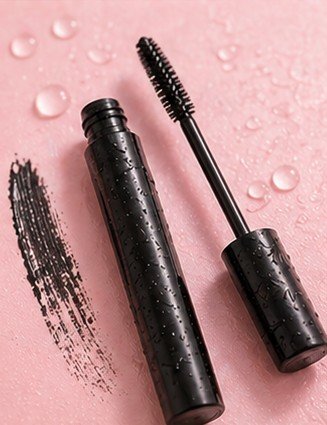
Waterproof mascara is designed to resist water, sweat, and humidity while keeping lashes lifted, defined, and smudge-free all day. It’s ideal for long wear, special events, and anyone who needs reliable, long-lasting lash performance.

Common Waterproof Mascara Questions Answered

What is waterproof mascara used for?

Waterproof mascara is designed to resist water, sweat, and humidity while keeping lashes defined and lifted all day.

When should I use waterproof mascara?

It’s ideal for long days, hot weather, workouts, weddings, or anytime you need extra staying power.

Does it hold curl better?

Yes — waterproof formulas help lashes stay lifted and curled longer than regular mascara.

Is it safe for sensitive eyes?

Yes, but choose gentle formulas and remove carefully to avoid irritation.

Can I use it every day?

You can, but many prefer alternating with regular mascara to avoid dryness.

Is it harder to remove?

Yes — it requires an oil-based remover or cleansing balm.

Does it damage lashes?

Not if removed properly without rubbing or pulling.

What looks is it best for?

Perfect for long-lasting, smudge-proof, and defined lash looks.

Most Searched Waterproof Mascara Questions

Why does my waterproof mascara clump?

Too many layers or a dry formula can cause clumping.

How do I remove waterproof mascara easily?

Use an oil-based remover and let it sit before gently wiping.

Why does it feel dry?

Waterproof formulas are less flexible, which can feel drier than regular mascara.

Can I layer it with regular mascara?

Yes — use regular mascara first, then seal with waterproof.

Waterproof Mascara Application Steps

Step 1: Prep Lashes

  • Start with clean, dry lashes
  • Use a lash curler for lift

Step 2: Apply First Coat

  • Wiggle wand from root to tip
  • Coat evenly for separation

Step 3: Build Volume

  • Add a second light layer
  • Avoid overloading lashes

Step 4: Define Lower Lashes

  • Use tip of wand
  • Apply lightly for precision

Step 5: Let Set

  • Allow formula to dry
  • Avoid touching to prevent smudging

Useful Waterproof Mascara Tools

  • Lash Curler – Enhances lift and curl
  • Oil-Based Remover – Safely removes formula
  • Lash Comb – Separates clumps

Waterproof Mascara Tips & Guidance

Best for Eye Types ✨

  • Oily lids: Prevents smudging
  • Straight lashes: Holds curl longer
  • Active lifestyles: Sweat-resistant wear
  • Watery eyes: Stays in place

Common Mistakes ⚠️

  • Applying too many coats
  • Not using proper remover
  • Skipping lash prep
  • Letting product dry out

Where to Apply 📍

  • Upper lashes
  • Lower lashes (lightly)
  • Focus on roots for lift

Choosing the Right Formula 🎯

Volumizing for fullness, lengthening for definition, lightweight formulas for everyday wear.

Waterproof Mascara Coverage, Finish & Effect Guide

Coverage Levels ✨

  • Light: Natural definition
  • Medium: Balanced volume and length
  • Full: Bold, dramatic lashes

Finish Types 💄

  • Natural – soft definition
  • Volumizing – thick and bold
  • Lengthening – extended lashes

Best For ✔

  • All-day wear
  • Hot or humid climates
  • Special events

May Not Be Ideal If ⚠

  • You want easy removal
  • You prefer lightweight formulas

Pro Tips 💡

  • Use sparingly to avoid stiffness
  • Always remove gently
  • Layer over regular mascara if needed

Still Deciding Which Mascara Is Right for You?

Explore different mascara types to find your perfect match for finish, effect, and wear.

Best Waterproof Mascaras

Maybelline Lash Sensational Waterproof

⭐ 4.6 / 5 from 60k+ reviews

Effect:
Full fan effect

Benefits:
Holds curl and resists smudging

Why we love it:
Great balance of volume and definition.

Buy Now

L’Oréal Lash Paradise Waterproof

⭐ 4.5 / 5 from 55k+ reviews

Effect:
Voluminous lashes

Benefits:
Soft yet long-lasting formula

Why we love it:
Bold lashes without heavy clumping.

Buy Now

Too Faced Better Than Sex Waterproof

⭐ 4.4 / 5 from 40k+ reviews

Effect:
Dramatic volume

Benefits:
High-impact waterproof wear

Why we love it:
Perfect for glam looks and events.

Buy Now

Covergirl LashBlast Volume Waterproof

⭐ 4.6 / 5 from 50k+ reviews

Effect:
Full, separated lashes

Benefits:
Clump-resistant formula

Why we love it:
Reliable everyday waterproof option.

Buy Now

Brightening eye pencil used on the waterline and inner corners to make eyes look bigger and more awake
Base Makeup, Brightening Eye Pencil, Eye Pencils, Eyes, Face

Brightening Eye Pencil

Brightening

Brightening Eye Pencil Guide: How to Make Eyes Look Bigger & Awake

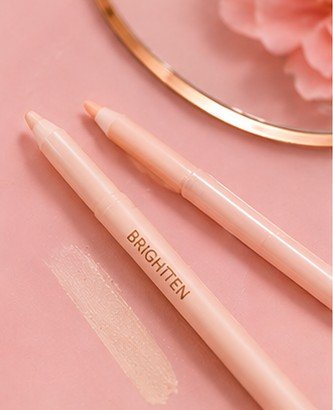
Brightening eye pencil is designed to make eyes look more awake, refreshed, and naturally enhanced. It uses light, nude, or soft tones to open up the eyes and reduce the appearance of tiredness. In this guide, you’ll learn how to apply it to the waterline, inner corners, and lash line for the most flattering effect.

Common Brightening Eye Pencil Questions Answered

What is a brightening eye pencil used for?

A brightening eye pencil is used to illuminate the eyes and make them look more awake and refreshed.

Where do I apply brightening eye pencil?

It is commonly applied to the waterline, inner corners of the eyes, and lower lash line.

Does it make eyes look bigger?

Yes — lighter shades help open up the eyes and create a larger, brighter appearance.

What color is best for brightening?

Nude, ivory, or soft beige shades work best for a natural brightening effect.

Is it safe for the waterline?

Yes, if the formula is ophthalmologist-tested and safe for eye use.

Can I use it every day?

Yes — it is designed for daily use to enhance eye brightness.

Does it replace concealer?

No — it enhances brightness around the eyes but does not replace concealer.

What makeup looks does it work with?

It works with natural, no-makeup looks as well as full glam makeup styles.

Most Searched Brightening Eye Pencil Questions

Why does my eye pencil not brighten enough?

It may be too dark or not applied to the correct areas.

How do I make my eyes look more awake?

Apply to waterline and inner corners for instant brightening.

Does it work on dark circles?

It can reduce the appearance of darkness but is not a treatment.

Can I use it with eyeliner?

Yes — it pairs well with both pencil and liquid eyeliner.

Brightening Eye Pencil Application Steps

Step 1: Prep Eyes

  • Clean under-eye area
  • Apply light concealer if needed

Step 2: Apply to Waterline

  • Gently line lower waterline
  • Use soft nude or beige shade

Step 3: Highlight Inner Corners

  • Apply small amount to inner eye corner
  • Blend slightly for natural glow

Step 4: Optional Lash Line

  • Lightly apply to lower lash line
  • Keep subtle for natural effect

Step 5: Set Look

  • Optional: set with light eyeshadow
  • Ensure long-lasting brightness

Useful Brightening Eye Pencil Tools

  • Concealer – Enhances brightness effect
  • Smudge Brush – Soft blending for corners
  • Setting Powder – Locks in product

Brightening Eye Pencil Tips & Guidance

Best for Eye Shapes ✨

  • Small eyes: Opens and enlarges appearance
  • Tired eyes: Adds instant brightness
  • Round eyes: Enhances natural shape
  • Hooded eyes: Lifts eye appearance subtly

Common Mistakes ⚠️

  • Using overly white harsh shades
  • Applying too much product
  • Skipping blending
  • Using non-eye-safe formulas

Where to Apply 📍

  • Waterline
  • Inner corners
  • Lower lash line (lightly)

Choosing the Right Finish 🎯

Creamy nude for natural brightness, matte beige for subtle enhancement, waterproof for long-lasting effect.

Brightening Eye Pencil Coverage, Finish & Shade Guide

Coverage Levels ✨

  • Light: Subtle brightening
  • Medium: Noticeable eye-opening effect
  • Full: Maximum brightness effect

Finish Types 💄

  • Creamy – smooth and blendable
  • Matte – natural soft finish
  • Waterproof – long-lasting wear

Best For ✔

  • Making eyes look awake
  • Brightening waterline
  • Soft natural makeup looks

May Not Be Ideal If ⚠

  • You want dark smoky looks
  • You prefer bold eyeliner styles

Shade Tips 💡

  • Nude for natural brightness
  • Ivory for stronger highlight
  • Soft beige for subtle glow

Still Deciding Which Eyeliner Is Right for You?

Explore different eyeliner types to find your perfect match for finish, formula, and application style.

Best Brightening Eye Pencils

NYX Wonder Pencil

⭐ 4.6 / 5 from 40k+ reviews

Coverage:
Soft nude brightening

Benefits:
Multi-use eye brightener

Why we love it:
Perfect for waterline and concealing edges.

Buy Now

Rimmel Soft Kohl Nude

⭐ 4.5 / 5 from 28k+ reviews

Coverage:
Natural brightening tone

Benefits:
Smooth application

Why we love it:
Great everyday eye-opener.

Buy Now

L’Oréal Infallible Brightening Pencil

⭐ 4.7 / 5 from 32k+ reviews

Coverage:
Longwear bright pigment

Benefits:
Waterproof formula

Why we love it:
Long-lasting eye-brightening effect.

Buy Now

Maybelline Master Kajal Nude

⭐ 4.6 / 5 from 30k+ reviews

Coverage:
Soft creamy nude

Benefits:
Easy waterline use

Why we love it:
Instant eye-awakening effect.

Buy Now

Sharpenable eye pencil used for precise eyeliner application on a pink background
Base Makeup, Eye Pencils, Eyes, Face, Sharpenable Eye Pencil

Sharpenable Eye Pencil

Sharpenable

Sharpenable Eye Pencil Guide: Precise, Defined Eyeliner Looks

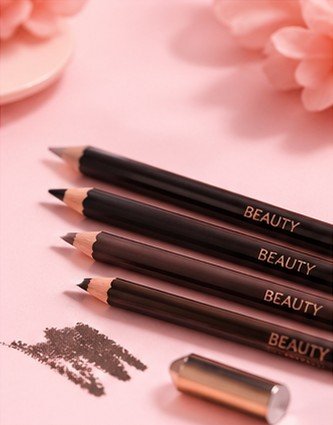
Sharpenable eye pencil is a traditional eyeliner that can be sharpened to create precise, controlled lines for detailed eye makeup. It offers more accuracy than twist-up pencils, making it ideal for sharp definition, smoky blending, or artistic eyeliner looks. In this guide, you’ll learn how to apply it, sharpen it correctly, and get the best results for your eye shape.

Common Sharpenable Eye Pencil Questions Answered

What is a sharpenable eye pencil?

A sharpenable eye pencil is a traditional eyeliner that is sharpened to maintain a precise tip.

Is sharpenable eye pencil better than retractable?

It depends — sharpenable pencils offer more precision, while retractable ones are more convenient.

Does it give sharper lines?

Yes — sharpening allows for very fine, precise eyeliner application.

Is it good for beginners?

Yes, but it requires a bit more control compared to twist-up pencils.

Does it smudge easily?

It depends on the formula; some are soft and smudgeable, others are long-wear.

Do I need a special sharpener?

Yes — a cosmetic sharpener works best for soft eyeliner pencils.

What looks can I create?

Precise lines, smoky looks, and detailed eyeliner styles.

Why use a sharpenable pencil?

It gives more control and precision for detailed eye makeup looks.

Most Searched Sharpenable Eye Pencil Questions

Why does my pencil break when sharpening?

The formula may be too soft or the sharpener too dull.

How do I sharpen without wasting product?

Use light pressure and a high-quality sharpener.

Can I use it on waterline?

Yes, if the formula is safe and ophthalmologist-tested.

How long does it last?

Typically 6–12 hours depending on formula.

Sharpenable Eye Pencil Application Steps

Step 1: Prep Eyes

  • Clean eyelids
  • Apply primer

Step 2: Sharpen Pencil

  • Use cosmetic sharpener
  • Create fine or soft tip

Step 3: Apply Line

  • Glide along lash line
  • Use controlled strokes

Step 4: Blend (Optional)

  • Smudge for smoky effect
  • Use brush or fingertip

Step 5: Set

  • Set with eyeshadow if needed
  • Lock in for longer wear

Useful Sharpenable Eye Pencil Tools

  • Cosmetic Sharpener – For precise tip
  • Smudge Brush – For blending
  • Eye Primer – Improves wear time

Sharpenable Eye Pencil Tips & Guidance

Best for Eye Shapes ✨

  • Hooded eyes: Thin precise lines
  • Monolid: Bold defined liner
  • Almond eyes: Versatile styles
  • Round eyes: Elongated liner looks

Common Mistakes ⚠️

  • Using dull sharpener
  • Over-sharpening soft pencils
  • Skipping primer
  • Applying uneven pressure

Where to Apply 📍

  • Upper lash line
  • Lower lash line
  • Waterline (if safe)

Choosing the Right Finish 🎯

Matte for precision, creamy for blendability, waterproof for long wear.

Sharpenable Eye Pencil Coverage, Finish & Shade Guide

Coverage Levels ✨

  • Light: Soft definition
  • Medium: Everyday liner
  • Full: Bold precise lines

Finish Types 💄

  • Matte – clean sharp look
  • Creamy – blendable finish
  • Longwear – extended hold

Best For ✔

  • Precision eyeliner looks
  • Smoky blending styles
  • Detail eye makeup

May Not Be Ideal If ⚠

  • You want no-maintenance pencils
  • You prefer twist-up convenience

Shade Tips 💡

  • Black for bold definition
  • Brown for soft looks
  • Nude for brightening eyes

Still Deciding Which Eyeliner Is Right for You?

Explore different eyeliner types to find your perfect match for finish, formula, and application style.

Best Sharpenable Eye Pencils

MAC Eye Kohl Pencil

⭐ 4.7 / 5 from 60k+ reviews

Coverage:
Smooth rich pigment

Benefits:
Highly precise application

Why we love it:
Iconic makeup artist favorite.

Buy Now

Urban Decay 24/7 Pencil

⭐ 4.8 / 5 from 55k+ reviews

Coverage:
Bold longwear color

Benefits:
Smudge-resistant formula

Why we love it:
Perfect balance of precision and wear.

Buy Now

Maybelline Color Show Pencil

⭐ 4.5 / 5 from 30k+ reviews

Coverage:
Soft everyday pigment

Benefits:
Affordable and easy to use

Why we love it:
Great beginner-friendly pencil.

Buy Now

L’Oréal Voluminous Pencil

⭐ 4.6 / 5 from 28k+ reviews

Coverage:
Smooth definition

Benefits:
Long-lasting wear

Why we love it:
Reliable everyday liner.

Buy Now

Lower lash eye pencil used for defining the lower lash line in eye makeup
Base Makeup, Eye Pencils, Eyes, Face, Lower Lash Eye Pencil

Lower Lash Eye Pencil

Lower

Lower Lash Eye Pencil Guide: How to Define & Enhance Your Eyes

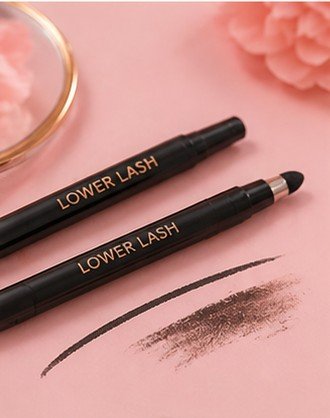
Lower lash eye pencil is used to define and enhance the lower lash line for balanced, expressive eye makeup. It can create anything from soft natural definition to bold, smoky effects depending on how it’s applied. In this guide, you’ll learn how to apply it correctly, avoid smudging, and choose the best style for your eye shape.

Common Lower Lash Eye Pencil Questions Answered

What is a lower lash eye pencil used for?

A lower lash eye pencil is used to define and enhance the lower lash line for balanced eye makeup.

Is it safe to use on the lower lash line?

Yes — as long as the formula is ophthalmologist-tested and safe for eye use.

Should I always line my lower lashes?

Not always — it depends on the look you want, from natural to dramatic styles.

Does it make eyes look smaller?

Darker lines can make eyes look smaller, while soft blending keeps them balanced.

What type of pencil works best?

Soft or smudgeable pencils work best for the lower lash line.

How do I stop it from smudging?

Set it with eyeshadow or use a long-wear formula.

Can I use waterproof pencil?

Yes — waterproof formulas are great for long-lasting lower lash definition.

What looks can I create?

Soft definition, smoky lower lash, or full eye definition looks.

Most Searched Lower Lash Eye Pencil Questions

Why does my lower lash liner smudge?

Oily skin and lack of setting powder can cause smudging.

How do I make it last longer?

Use primer and set with eyeshadow.

Should lower lash liner be thick or thin?

Thin lines are best for natural looks, thicker for dramatic styles.

Can I skip lower lash eyeliner?

Yes — it’s optional depending on your makeup style.

Lower Lash Eye Pencil Application Steps

Step 1: Prep Eyes

  • Clean under-eye area
  • Apply concealer if needed

Step 2: Apply Light Line

  • Use soft pencil
  • Draw thin line close to lashes

Step 3: Blend (Optional)

  • Use brush or fingertip
  • Soften harsh edges

Step 4: Build Depth

  • Darken outer corner if desired
  • Keep inner corner lighter

Step 5: Set

  • Use eyeshadow to lock in place
  • Prevent smudging

Useful Lower Lash Eye Pencil Tools

  • Smudge Brush – Soft blending
  • Small Angled Brush – Precision control
  • Setting Powder – Prevents smudging

Lower Lash Eye Pencil Tips & Guidance

Best for Eye Shapes ✨

  • Small eyes: Keep line very thin
  • Round eyes: Extend slightly outward
  • Almond eyes: Balanced soft liner
  • Hooded eyes: Light lower definition

Common Mistakes ⚠️

  • Applying too thick a line
  • Skipping blending
  • Using harsh dark color everywhere
  • Not setting product

Where to Apply 📍

  • Outer lower lash line
  • Middle lash line (lightly)
  • Outer corner for lift

Choosing the Right Finish 🎯

Soft matte for natural looks, smudgeable pencil for smoky effects, waterproof for long wear.

Lower Lash Eye Pencil Coverage, Finish & Shade Guide

Coverage Levels ✨

  • Light: Natural definition
  • Medium: Soft enhancement
  • Full: Smoky lower lash look

Finish Types 💄

  • Matte – natural definition
  • Creamy – blendable finish
  • Waterproof – long-lasting wear

Best For ✔

  • Defining lower lash line
  • Smoky eye makeup
  • Balanced eye looks

May Not Be Ideal If ⚠

  • You prefer no lower lash makeup
  • You want ultra-natural looks only

Shade Tips 💡

  • Brown for soft definition
  • Black for bold looks
  • Nude for brightening effect

Still Deciding Which Eyeliner Is Right for You?

Explore different eyeliner types to find your perfect match for finish, formula, and application style.

Best Lower Lash Eye Pencils

Urban Decay 24/7 Glide-On Pencil

⭐ 4.8 / 5 from 55k+ reviews

Coverage:
Smooth lower lash definition

Benefits:
Long-wear smudge-resistant formula

Why we love it:
Perfect for precise lower lash looks.

Buy Now

Maybelline TattooStudio Pencil

⭐ 4.6 / 5 from 40k+ reviews

Coverage:
Bold pigment

Benefits:
Waterproof long wear

Why we love it:
Great for all-day lower lash definition.

Buy Now

NYX Slim Eye Pencil

⭐ 4.5 / 5 from 30k+ reviews

Coverage:
Soft buildable color

Benefits:
Easy everyday use

Why we love it:
Perfect for natural lower lash looks.

Buy Now

L’Oréal Infallible Pencil

⭐ 4.7 / 5 from 28k+ reviews

Coverage:
Smooth longwear pigment

Benefits:
Fade-resistant wear

Why we love it:
Reliable all-day lower lash liner.

Buy Now

Scroll to Top