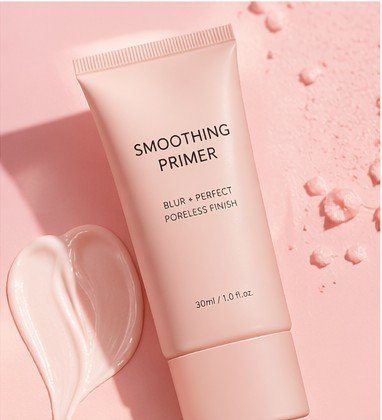
Author name: bestglampx@gmail.com

Smoothing primer in a tube for blurring pores and creating a smooth makeup base
Base Makeup, Face, Face Primer, Smoothing Primer

Smoothing Primer

Smoothing primer blurring pores and creating a smooth makeup base

Smoothing Primer Guide: Blur Pores, Smooth Texture & Perfect Your Base

Learn how smoothing primer works, how to apply it correctly, and which formulas help blur pores, smooth texture, and create a flawless base for makeup.

Common Smoothing Primer Questions Answered

What does a smoothing primer do?

It blurs texture, minimizes pores, and creates a smooth base for makeup application.

Do I apply primer before or after moisturizer?

Apply primer after moisturizer and sunscreen so it sits properly on prepped skin.

Is smoothing primer good for dry skin?

Yes — hydrating primers help reduce flakiness and create a more even surface.

Is smoothing primer good for oily skin?

Yes — silicone or mattifying primers help control shine and blur pores.

Can I wear smoothing primer without makeup?

Yes — it can be worn alone for a soft-focus, blurred skin effect.

How much primer should I use?

A pea-sized amount is enough for the entire face.

Why is my makeup separating over primer?

You may be using too much product or not letting skincare absorb first.

Does primer replace moisturizer?

No — primer enhances texture, while moisturizer hydrates the skin.

Most Searched Smoothing Primer Questions

Do primers really blur pores?

Yes — silicone-based formulas can visibly soften pore appearance.

Can smoothing primer help with texture?

Yes — it helps create a more even surface before foundation.

Is primer necessary every day?

No — it depends on your makeup routine and skin needs.

Does primer make makeup last longer?

Yes — it helps foundation grip better and stay in place longer.

Smoothing Primer Application Steps

Step 1: Prep Your Skin

  • Cleanse and moisturize your skin
  • Apply sunscreen if needed
  • Let skincare fully absorb

Step 2: Choose the Right Primer

  • Hydrating for dry skin
  • Mattifying for oily skin
  • Pore-blurring for texture concerns

Step 3: Apply Primer

  • Use a pea-sized amount
  • Focus on T-zone and textured areas
  • Gently smooth into skin

Step 4: Let It Set

  • Wait 30–60 seconds before foundation
  • Allow primer to bond with skin

Step 5: Apply Makeup

  • Use light layers of foundation
  • Blend evenly for smooth finish

Useful Smoothing Primer Tools

  • Fingertips – Best for melting product into skin
  • Makeup Sponge – Even, lightweight application
  • Brush – Smooth blending for larger areas

Smoothing Primer Tips & Guidance

Best Primer for Each Skin Type ✨

  • Dry skin: Hydrating, glow-boosting primers
  • Oily skin: Mattifying, oil-control primers
  • Combination skin: Targeted application zones
  • Sensitive skin: Fragrance-free formulas

Common Primer Mistakes ⚠️

  • Using too much product
  • Skipping moisturizer
  • Applying immediately after skincare
  • Choosing wrong formula for skin type

Where to Apply Primer 📍

  • T-zone for oil control
  • Cheeks for smoothing texture
  • Under makeup areas only (not full face if not needed)

Choosing the Right Finish 🎯

Blurring for pores, matte for shine control, and hydrating for glow.

Smoothing Primer Texture, Finish & Skin Prep Guide

Primer Types ✨

  • Blurring – smooths pores and texture
  • Hydrating – boosts moisture and glow
  • Mattifying – controls shine

Finish Types 💄

  • Natural – soft skin effect
  • Matte – shine-free base
  • Radiant – glow-enhancing base

Best For ✔

  • Smoothing texture before makeup
  • Extending makeup wear time
  • Creating flawless foundation base

May Not Be Ideal If ⚠

  • You prefer minimal skincare steps
  • You already have very smooth skin
  • You dislike layered products

Skin Prep Tips 💡

  • Always moisturize first
  • Let skincare absorb fully
  • Apply thin, even layer of primer

Still Deciding Which Primer Is Right for You?

If you’re still deciding which illuminating primer works best for your skin type, explore our detailed guides below to compare finishes, textures, and benefits:

Best Smoothing Primers

Smashbox Photo Finish Smooth & Blur Primer

⭐ 4.7 / 5 from 40k+ reviews

Coverage:
Silky blurring base with lightweight feel

Benefits:
Minimizes the look of pores, fine lines, and texture for a smooth canvas

Why we love it:
Iconic smoothing primer that creates a soft-focus finish and helps makeup glide on effortlessly.

Buy Now

Benefit The POREfessional Face Primer

⭐ 4.6 / 5 from 60k+ reviews

Coverage:
Pore-blurring, semi-matte smoothing base

Benefits:
Visibly reduces pore appearance and controls shine while smoothing skin texture

Why we love it:
A lightweight balm that instantly creates a filtered-skin effect under makeup.

Buy Now

e.l.f. Poreless Putty Primer

⭐ 4.5 / 5 from 75k+ reviews

Coverage:
Velvety smoothing putty texture

Benefits:
Fills in pores and fine lines for a soft, even base that grips makeup

Why we love it:
Affordable and effective primer that delivers high-end smoothing results.

Buy Now

Tatcha The Silk Canvas Protective Primer

⭐ 4.7 / 5 from 20k+ reviews

Coverage:
Luxury balm-to-silk smoothing veil

Benefits:
Blurs imperfections while protecting skin and extending makeup wear

Why we love it:
Leaves skin looking refined and polished with a soft-focus, airbrushed finish.

Buy Now

Pink color corrector in a cosmetic jar for brightening dull skin
Base Makeup, Corrector, Face, Pink Corrector

Pink Corrector

Pink color corrector used to brighten under-eye area and revive dull, tired skin before concealer

Pink Color Corrector: What It Is, Who Should Use It & How to Apply It

Pink color corrector helps brighten dull, tired-looking skin and neutralize mild blue or gray tones, especially under the eyes. It is commonly used on fair to light skin tones to restore a fresh, healthy-looking glow before applying concealer or foundation. This guide explains what pink corrector does, who should use it, and how to apply it for a naturally bright finish.

What Is Pink Color Corrector?

What It Does

Pink color corrector brightens dull, tired-looking skin and helps revive the under-eye area before concealer.

Where To Use It

  • Under-eye dullness
  • Fatigued skin
  • Light blue/gray shadows
  • Areas needing brightness

Why It Works

Pink adds warmth and brightness, helping skin look more awake and refreshed before base makeup.

Who Should Use Pink Corrector?

Best For Fair–Light Skin

  • Dull under-eyes
  • Tired-looking complexion
  • Light discoloration

If Skin Looks Tired

Pink corrector is ideal when skin appears dull, flat, or lacks natural brightness.

Great For Subtle Brightening

Unlike stronger correctors, pink is used mainly for brightening rather than heavy correction.

How To Apply Pink Corrector

Prep Skin

  • Apply moisturizer
  • Let it absorb

Apply Light Layer

  • Tap under eyes or dull areas
  • Use minimal product

Blend

  • Blend softly
  • Keep brightness even

Add Concealer

  • Apply concealer on top
  • Blend naturally

Best Tools For Pink Corrector

  • Damp makeup sponge
  • Small concealer brush
  • Ring finger for light tapping

Not sure if pink corrector is right for you?Pink corrector is best for brightening dull or tired-looking skin rather than heavy discoloration correction.

Best Pink Color Correctors

L.A. Girl HD Pro Conceal Pink Corrector

⭐ 4.6 / 5 from 95k+ reviews

Coverage:
Light-to-medium pink brightening correction

Benefits:
Helps neutralize blue/purple under-eye darkness and adds instant brightness to dull skin

Why we love it:
Affordable cult favorite that brightens without looking heavy or overly pigmented.

Buy Now

e.l.f. Camo Color Corrector (Pink)

⭐ 4.5 / 5 from 85k+ reviews

Coverage:
Creamy buildable pink correction

Benefits:
Brightens under-eyes and neutralizes mild darkness while blending smoothly into skin

Why we love it:
Easy-to-use formula that layers well under concealer for a fresh, awake look.

Buy Now

Bobbi Brown Brightening Corrector (Pink / Light Bisque Shades)

⭐ 4.7 / 5 from 45k+ reviews

Coverage:
Creamy full correction with soft pink undertones

Benefits:
Cancels dark circles and adds radiance before concealer for a smooth, lifted finish

Why we love it:
Professional-grade formula that instantly wakes up tired under-eyes without creasing.

Buy Now

Kosas Revealer Brightening Color Corrector (Pink Tone)

⭐ 4.6 / 5 from 30k+ reviews

Coverage:
Radiant medium coverage brightening corrector

Benefits:
Hydrates, brightens, and smooths under-eyes while reducing the look of shadows

Why we love it:
Clean beauty formula that gives a natural, skin-like glow instead of heavy coverage.

Buy Now

Pink vs Other Correctors

ColorBest For
PinkDull / tired skin
PeachBlue under-eye circles
YellowBrightness & purple tones

Browse More Color Correctors

Lavender color corrector in a cosmetic jar for brightening dull and yellow-toned skin
Base Makeup, Corrector, Face, Lavender Corrector

Lavender Corrector

Lavender color corrector used to brighten dull and yellow-toned skin before foundation

Lavender Color Corrector: What It Is, Who Should Use It & How to Apply It

Lavender color corrector helps brighten dull, yellow-toned, or sallow skin before applying foundation or concealer. It is commonly used to restore radiance and even out the complexion when skin looks tired or flat. This guide explains what lavender corrector does, who should use it, and how to apply it for a soft, natural glow.

What Is Lavender Color Corrector?

What It Does

Lavender color corrector brightens yellow or sallow skin tones and adds a soft radiance before foundation or concealer.

Where To Use It

  • Dull or yellow-toned skin
  • Uneven skin tone
  • Fatigued complexion
  • Areas needing brightness

Why It Works

Lavender neutralizes yellow tones on the skin while adding brightness, helping the complexion look fresher and more even.

Who Should Use Lavender Corrector?

Best For Fair–Light Skin

  • Yellow or sallow tones
  • Dull complexion
  • Fatigue in skin appearance

If Skin Looks Yellow

Lavender corrector is ideal when skin appears slightly yellow, dull, or tired.

Great As Brightener

Unlike other correctors, lavender is often used more for brightening than heavy correction.

How To Apply Lavender Corrector

Prep Skin

  • Apply moisturizer
  • Let it absorb

Apply Light Layer

  • Use small amount
  • Focus on dull areas

Blend

  • Blend evenly
  • Keep coverage light

Add Foundation

  • Apply foundation on top
  • Blend naturally

Best Tools For Lavender Corrector

  • Damp makeup sponge
  • Soft concealer brush
  • Light tapping with fingers

Not sure if lavender corrector is right for you?Lavender corrector is best for dull or yellow-toned skin that needs subtle brightening rather than heavy color correction.

Best Lavender Color Correctors

LA Girl HD Pro Conceal Lavender Corrector

⭐ 4.6 / 5 from 90k+ reviews

Coverage:
Light-to-medium lavender color correction

Benefits:
Neutralizes yellow tones, sallowness, and dullness while brightening the complexion

Why we love it:
Affordable cult-favorite that easily mixes under foundation for a cooler, more balanced skin tone.

Buy Now

Tarte Shape Tape Corrector (Lavender)

⭐ 4.5 / 5 from 20k+ reviews

Coverage:
Creamy full-coverage lavender corrector

Benefits:
Brightens dull areas and neutralizes yellow undertones with a smooth, hydrating formula

Why we love it:
Ultra-blendable formula that layers seamlessly under concealer for a fresh, lifted look.

Buy Now

Fenty Beauty Bright Fix Eye Brightener (Lavender Shades)

⭐ 4.7 / 5 from 55k+ reviews

Coverage:
Sheer-to-medium brightening lavender corrector

Benefits:
Instantly lifts dullness and adds radiance while blurring under-eye fatigue

Why we love it:
Gives a soft, awake look without feeling heavy or creasing under makeup.

Buy Now

NYX Color Correcting Concealer (Lavender)

⭐ 4.4 / 5 from 40k+ reviews

Coverage:
Buildable lavender-toned correction

Benefits:
Helps counteract sallow, yellow undertones and creates a more even skin base

Why we love it:
Budget-friendly option that blends easily and works well for everyday brightening.

Buy Now

Lavender vs Other Correctors

ColorBest For
LavenderDull / yellow skin
YellowPurple tones
PeachBlue circles

Browse More Color Correctors

Yellow color corrector for brightening dull skin and evening out purple or uneven skin tone before makeup
Base Makeup, Corrector, Face, Yellow Corrector

Yellow Corrector

Yellow color corrector used to brighten dull skin and neutralize purple tones before concealer

Yellow Color Corrector: What It Is, Who Should Use It & How to Apply It

Yellow color corrector helps brighten dull areas of the face while neutralizing purple and mild blue tones. It is commonly used under the eyes, around the mouth, or anywhere skin looks tired or uneven. This guide explains what yellow corrector does, who should use it, and how to apply it for a natural, radiant finish.

What Is Yellow Color Corrector?

What It Does

Yellow color corrector brightens dull skin and neutralizes purple or mild blue tones before concealer.

Where To Use It

  • Under-eye darkness
  • Dull or tired-looking skin
  • Light purple discoloration
  • Uneven skin tone areas

Why It Works

Yellow helps balance purple tones and adds brightness, creating a more even and radiant base.

Who Should Use Yellow Corrector?

Best For All Skin Tones

  • Light under-eye purple tones
  • Dullness or fatigue
  • Natural brightening

If Skin Looks Dull

Yellow corrector is ideal when skin lacks brightness or appears slightly shadowed.

Great For Everyday Use

Unlike stronger correctors, yellow can be used lightly for daily brightening.

How To Apply Yellow Corrector

Prep Skin

  • Apply moisturizer
  • Let it absorb fully

Apply Light Layer

  • Tap under eyes or dull areas
  • Use thin coverage

Blend

  • Blend edges softly
  • Keep brightness even

Add Concealer

  • Apply concealer on top
  • Blend naturally

Best Tools For Yellow Corrector

  • Damp makeup sponge
  • Small concealer brush
  • Ring finger for light blending

Not sure if yellow corrector is right for you?Yellow corrector is best for brightening dull skin and soft purple tones without heavy correction.

Best Yellow Color Correctors

e.l.f. Camo Color Corrector (Yellow)

⭐ 4.6 / 5 from 80k+ reviews

Coverage:
Light-to-medium brightening yellow correction

Benefits:
Helps neutralize purple tones and dullness while brightening under-eyes and dark areas

Why we love it:
Smooth, blendable formula that layers easily under concealer without creasing or heaviness.

Buy Now

LA Girl HD Pro Conceal Yellow Corrector

⭐ 4.7 / 5 from 110k+ reviews

Coverage:
High-pigment yellow color correction

Benefits:
Brightens dull skin and neutralizes purple discoloration like under-eye shadows and veins

Why we love it:
Affordable, full-coverage corrector that delivers strong brightening power with minimal product.

Buy Now

Bobbi Brown Corrector (Light Bisque / Yellow-Undertone Shades)

⭐ 4.7 / 5 from 38k+ reviews

Coverage:
Creamy full correction with soft yellow undertones

Benefits:
Neutralizes purple-blue under-eye circles and creates a smooth base for concealer

Why we love it:
Professional-grade formula that blends seamlessly and prevents grayness under concealer.

Buy Now

NYX Color Correcting Palette (Yellow Shade)

⭐ 4.5 / 5 from 60k+ reviews

Coverage:
Buildable yellow correction in palette format

Benefits:
Targets dullness and mild discoloration with customizable coverage levels

Why we love it:
Versatile palette with multiple corrector shades, perfect for mixing and precision application.

Buy Now

Yellow vs Other Correctors

ColorBest For
YellowDullness & purple tones
PeachBlue under-eye circles
GreenRedness

Browse More Color Correctors

Green color corrector for neutralizing redness and acne before applying foundation or concealer
Base Makeup, Corrector, Face, Green Corrector

Green Corrector

Green color corrector used to neutralize redness on skin before foundation

Green Color Corrector: What It Is, Who Should Use It & How to Apply It

Green color corrector helps neutralize redness in the skin, making it less visible under foundation and concealer. It is commonly used for acne, rosacea, and general facial redness around the cheeks and nose. This guide explains what green corrector does, who should use it, and how to apply it for the most natural, even-looking skin.

What Is Green Color Corrector?

What It Does

Green corrector neutralizes redness so foundation and concealer apply more evenly.

Where To Use It

  • Acne redness
  • Rosacea
  • Red cheeks
  • Around the nose

Why It Works

Green sits opposite red on the color wheel, helping cancel visible redness before applying base makeup.

Who Should Use Green Corrector?

Best For Redness

  • Acne spots
  • Rosacea-prone skin
  • Red cheeks and nose

Works On All Skin Tones

Green corrector can be used on fair, medium, and deep skin tones wherever redness appears.

Use Before Foundation

Apply green corrector before foundation to create a more even-looking base.

How To Apply Green Corrector

Prep Skin

  • Apply moisturizer first
  • Allow it to absorb

Apply Small Amount

  • Tap onto red areas only
  • Avoid applying everywhere

Blend Gently

  • Blend edges softly
  • Keep correction targeted

Apply Foundation

  • Layer foundation on top
  • Blend normally

Best Tools For Green Corrector

  • Small precision concealer brush
  • Damp sponge for blending
  • Clean fingertip for spot correction

Not sure if green corrector is right for you?Green corrector works best when skin redness shows through foundation or concealer and needs targeted neutralizing before applying base makeup.

Best Green Color Correctors

LA Girl HD Pro Conceal Green Corrector

⭐ 4.7 / 5 from 120k+ reviews

Coverage:
High-pigment green correction for strong redness neutralizing

Benefits:
Effectively cancels redness from acne, rosacea, and irritation with buildable coverage

Why we love it:
Ultra-popular drugstore staple that delivers powerful correction without breaking the bank.

Buy Now

e.l.f. Camo Color Corrector (Green)

⭐ 4.6 / 5 from 85k+ reviews

Coverage:
Medium-to-full creamy green correction

Benefits:
Neutralizes redness while blending smoothly under concealer and foundation

Why we love it:
Beginner-friendly formula that’s easy to blend and perfect for everyday redness control.

Buy Now

Smashbox Photo Finish Correct Anti-Redness Primer

⭐ 4.5 / 5 from 45k+ reviews

Coverage:
Light green-tinted smoothing primer

Benefits:
Reduces visible redness while blurring pores and extending makeup wear

Why we love it:
Acts as both primer and corrector for a smooth, even-toned base.

Buy Now

Dr. Jart+ Cicapair Tiger Grass Color Correcting Treatment

⭐ 4.7 / 5 from 60k+ reviews

Coverage:
Adaptive green-to-beige color correcting cream

Benefits:
Instantly neutralizes redness while soothing skin with centella asiatica

Why we love it:
Skincare-meets-makeup formula that calms skin while evening out tone naturally.

Buy Now

Green vs Other Correctors

ColorBest For
GreenRedness and acne
PeachBlue under-eye circles
OrangeDeep discoloration

Browse More Color Correctors

Orange color corrector for neutralizing dark circles and deep discoloration before foundation or concealer
Base Makeup, Corrector, Face, Orange Corrector

Orange Corrector

Orange color corrector used to neutralize dark under-eye circles before concealer

Orange Color Corrector: What It Is, Who Should Use It & How to Apply It

Orange color corrector helps neutralize deep blue, purple, and brown under-eye darkness before concealer is applied. It’s especially helpful for medium to deep skin tones or for anyone with stronger discoloration that peach corrector doesn’t fully brighten. This guide explains what orange corrector does, who should use it, and how to apply it for the most natural-looking results.

What Is Orange Color Corrector?

What It Does

Orange corrector neutralizes deep blue, purple, and brown under-eye darkness before concealer is applied.

Where To Use It

  • Deep under-eye circles
  • Hyperpigmentation areas
  • Shadowed mouth corners
  • Dark spots on medium–deep skin tones

Why It Works

Orange corrector balances strong cool-toned discoloration so concealer appears brighter and more even.

Who Should Use Orange Corrector?

Best For Medium–Deep Skin

  • Deep under-eye circles
  • Brown discoloration
  • Strong purple tones

If Peach Isn’t Enough

Orange corrector works when peach corrector doesn’t fully neutralize darkness.

Great For Hyperpigmentation

Orange helps reduce the appearance of dark spots before foundation or concealer.

How To Apply Orange Corrector

Prep Skin

  • Apply moisturizer first
  • Let absorb fully

Apply Small Amount

  • Tap onto darkest areas only
  • Use thin layers

Blend

  • Blend edges softly
  • Keep correction targeted

Add Concealer

  • Apply concealer over corrector
  • Set if needed

Best Tools For Orange Corrector

  • Precision concealer brush
  • Damp blending sponge
  • Ring finger tapping method

Not sure if orange corrector is right for you?Orange corrector works best when under-eye darkness appears deep brown or purple and needs stronger correction than peach can provide.

Best Orange Color Correctors

LA Girl HD Pro Conceal Orange Corrector

⭐ 4.7 / 5 from 120k+ reviews

Coverage:
High-pigment orange correction for deep discoloration

Benefits:
Neutralizes blue and dark undertones like under-eye circles, hyperpigmentation, and shadows

Why we love it:
A cult-favorite corrector that delivers strong payoff with a lightweight, blendable formula.

Buy Now

e.l.f. Camo Color Corrector (Orange)

⭐ 4.5 / 5 from 85k+ reviews

Coverage:
Creamy medium-to-full orange correction

Benefits:
Brightens dark circles and discoloration while smoothing under makeup

Why we love it:
Easy-to-blend formula that layers seamlessly under concealer without looking heavy.

Buy Now

Bobbi Brown Corrector (Dark Peach / Orange)

⭐ 4.6 / 5 from 40k+ reviews

Coverage:
Full coverage creamy corrector for deep discoloration

Benefits:
Neutralizes stubborn dark circles and bluish tones for a smooth, even base

Why we love it:
Professional-grade formula designed specifically for long-lasting under-eye correction.

Buy Now

Live Tinted Huestick (Rise / Orange)

⭐ 4.7 / 5 from 50k+ reviews

Coverage:
Buildable cream-to-stick orange correction

Benefits:
Multitasking formula that corrects, brightens, and blends effortlessly into skin

Why we love it:
Clean, inclusive beauty stick that works on eyes, lips, and face for seamless correction.

Buy Now

Orange vs Other Correctors

ColorBest For
OrangeDeep brown & purple darkness
PeachBlue under-eye circles
YellowPurple tones

Browse More Color Correctors

Peach color corrector for neutralizing under-eye dark circles and brightening tired-looking skin before makeup
Base Makeup, Corrector, Face, Peach Corrector

Peach Corrector

Peach color corrector for blue under-eye circles

Peach Color Corrector: What It Is, Who Should Use It & How to Apply It

Peach color corrector helps neutralize blue and gray under-eye circles so concealer looks brighter and more natural. It’s one of the easiest color-correcting steps to add to your routine, especially if your dark circles make you look tired even after applying concealer. This guide explains what peach corrector does, who should use it, and how to apply it for the most natural results.

What Is Peach Color Corrector?

What It Does

Peach color corrector neutralizes blue, purple, and gray tones under the eyes.
It brightens darkness before concealer so your under-eye area looks more awake and even.

Where To Use It

  • Under-eye dark circles
  • Inner corner darkness
  • Shadowed tear troughs
  • Around the mouth (on lighter skin tones)

Why It Works

Peach sits opposite blue tones on the color wheel. That contrast cancels discoloration so concealer
needs less coverage and looks smoother.

Who Should Use Peach Corrector?

Best For Light–Medium Skin

  • Neutralizes blue under-eye circles
  • Softens shadowy tear troughs
  • Brightens dull areas naturally

If Your Circles Look Blue

Peach corrector works best when darkness appears bluish rather than brown.
It restores warmth before concealer is applied.

Not Ideal If Circles Are Deep Brown

If under-eye darkness looks deeper brown or purple, a deeper orange corrector may provide stronger correction.

How To Apply Peach Corrector Step-By-Step

Step 1: Start With Skincare

  • Apply moisturizer or eye cream first
  • Let it absorb fully
  • This prevents creasing later

Step 2: Apply A Small Amount

  • Use only where darkness appears
  • Tap gently under eyes
  • A thin layer works best

Step 3: Blend Softly

  • Blend edges without removing product
  • Keep coverage focused on discoloration
  • Avoid spreading too far outward

Step 4: Apply Concealer On Top

  • Use a skin-tone concealer
  • Blend lightly over corrector
  • Set with powder if needed

Best Tools For Applying Peach Corrector

  • Small concealer brush for precise placement
  • Damp sponge for seamless blending
  • Ring finger for gentle tapping under eyes
  • Flat synthetic brush for targeted correction

Not sure if peach corrector is right for you?

If your dark circles look blue or gray on light to medium skin tones, peach corrector is usually the most natural-looking solution before concealer.

If discoloration appears deeper brown or purple, consider switching to a deeper orange corrector instead.

Best Peach Color Correctors

e.l.f. Camo Color Corrector (Peach)

⭐ 4.5 / 5 from 80k+ reviews

Coverage:
Lightweight peach-toned correcting coverage

Benefits:
Neutralizes dark circles and discoloration while hydrating skin for smooth layering under concealer

Why we love it:
Affordable, easy-to-blend formula that brightens under-eyes without feeling heavy or cakey.

Buy Now

LA Girl Pro Conceal HD Color Corrector (Peach)

⭐ 4.6 / 5 from 120k+ reviews

Coverage:
High-pigment peach correction with buildable coverage

Benefits:
Effectively cancels blue and purple undertones in dark circles and pigmentation

Why we love it:
A long-time drugstore favorite for strong correction at an affordable price point.

Buy Now

Bobbi Brown Corrector (Peach Bisque / Light Peach)

⭐ 4.7 / 5 from 35k+ reviews

Coverage:
Creamy full correction for under-eye darkness

Benefits:
Brightens and neutralizes deep discoloration before concealer for a flawless base

Why we love it:
Professional-grade formula that blends seamlessly and works especially well for stubborn dark circles.

Buy Now

Huda Beauty #FauxFilter Color Corrector (Peach)

⭐ 4.6 / 5 from 40k+ reviews

Coverage:
Rich peach corrector with high coverage payoff

Benefits:
Neutralizes discoloration while smoothing texture for a filtered-skin effect

Why we love it:
Ultra-pigmented formula that layers beautifully under concealer for a bright, perfected finish.

Buy Now

Peach Corrector vs Other Color Correctors

Corrector ColorBest ForSkin Tone Match
PeachBlue under-eye circlesLight–Medium skin tones
OrangeDeep brown darknessMedium–Deep skin tones
PinkDullness and brightnessFair skin tones
YellowPurple tonesMost skin tones

Browse More Color Correctors

Sheer highlighter Compact for soft natural glow
Base Makeup, Face, Foundation, Highlighter, Powder Foundation, Sheer Glow Highlighter, Uncategorized

Sheer Highlighter

Sheer Glow Highlighter compact swatch

Sheer Highlighter Guide: What It Is, Who It’s For, and How to Choose the Best One Alternative options:

Sheer highlighter is a lightweight formula designed to give the skin a subtle, natural-looking glow without obvious shimmer or glitter. It enhances the complexion with a soft radiance that looks like real skin, making it perfect for “no-makeup makeup” looks. Sheer highlighter is ideal when you want a fresh, healthy glow that’s understated and elegant.

Common Sheer Highlighter Questions Answered

What is sheer highlighter used for?

Sheer highlighter is used to create a soft, natural glow that looks like real skin radiance.

Is sheer highlighter good for natural makeup?

Yes — it gives a barely-there glow that enhances skin without looking heavy.

Does sheer highlighter work on all skin types?

Yes, it works well on all skin types because it is lightweight and buildable.

Where do you apply sheer highlighter?

Apply to cheekbones, brow bone, nose bridge, and cupid’s bow.

Does sheer highlighter look glittery?

No — it gives a soft, skin-like glow rather than strong sparkle.

Can you build sheer highlighter?

Yes — you can layer it for a slightly stronger glow while keeping it natural.

Is sheer highlighter good for beginners?

Yes — it’s very forgiving and hard to over-apply.

What finish does sheer highlighter give?

A soft, luminous, lit-from-within glow.

Most Searched Sheer Highlighter Questions

Is sheer highlighter better than powder?

It gives a more natural, subtle glow compared to traditional powder highlighter.

Does sheer highlighter last all day?

It lasts well when applied over a set base or layered lightly.

Can you wear sheer highlighter every day?

Yes — it’s perfect for everyday “no makeup makeup” looks.

Does sheer highlighter show on dark skin?

Yes — it enhances natural radiance without looking ashy when matched correctly.

Sheer Highlighter Application Steps

Step 1: Prep Your Skin

  • Apply moisturizer and base makeup if needed

Step 2: Choose Your Shade

  • Pick champagne, pearl, or soft pink tones
  • Match undertone for natural glow

Step 3: Apply Lightly

  • Tap or swipe a small amount on high points
  • Start sheer and build slowly

Step 4: Blend

  • Use fingers or a soft brush
  • Blend until seamless and skin-like

Step 5: Build If Needed

  • Add thin layers for more glow
  • Keep finish light and natural

Useful Sheer Highlighter Tools

  • Fingers – best for melting into skin
  • Fan Brush – ultra-light glow application
  • Small Blending Brush – precise soft highlight

Sheer Highlighter Tips & Guidance

Best by Skin Type ✨

  • Dry skin: Dewy sheer formulas
  • Oily skin: Lightweight gel or balm finishes
  • Combination skin: Buildable sheer textures
  • Sensitive skin: Fragrance-free options

Common Mistakes ⚠️

  • Applying too much product
  • Not blending enough
  • Using overly shimmery formulas
  • Skipping skin prep

Where to Apply 📍

  • Cheekbones
  • Brow bone
  • Nose bridge
  • Cupid’s bow

Finish Guide 🎯

Sheer highlighter gives a soft, natural, lit-from-within glow that enhances your skin rather than sitting on top of it.

Sheer Highlighter Coverage, Finish & Shade Guide

Glow Levels ✨

  • Soft: Barely-there glow
  • Medium: Natural radiance
  • Buildable: Layered glow

Finish Types 💄

  • Skin-like glow – natural radiance
  • Dewy sheer – fresh luminous finish

Best For ✔

  • Natural makeup looks
  • Everyday wear
  • Beginners
  • All skin types

May Not Be Ideal If ⚠

  • You want intense metallic highlight
  • You prefer bold shimmer looks

Shade Matching Tips 💡

  • Champagne = universal glow
  • Pearl = cool undertones
  • Soft gold = warm undertones

Still Deciding Which Highlighter Is Right for You?

Top Sheer Highlighters to Try

Glossier Haloscope Highlighter

⭐ 4.5 / 5 from 20k+ reviews

Glow Level: Natural dewy glow Benefits: Hydrating core + sheer shimmer Why we love it: Gives a real-skin luminous finish. Buy Now

Saie Glowy Super Gel

⭐ 4.7 / 5 from 30k+ reviews

Glow Level: Soft radiant sheen Benefits: Lightweight sheer glow booster Why we love it: Perfect for no-makeup makeup looks. Buy Now

Rare Beauty Positive Light Liquid Luminizer

⭐ 4.8 / 5 from 35k+ reviews

Glow Level: Buildable sheer glow Benefits: Ultra-light reflective finish Why we love it: Blends seamlessly into skin. Buy Now

e.l.f. Halo Glow Highlight Wand

⭐ 4.6 / 5 from 40k+ reviews

Glow Level: Soft luminous glow Benefits: Affordable sheer highlight Why we love it: Easy everyday glow with natural finish. Buy Now
Cream to powder highlighter makeup product for natural glow
Base Makeup, Cream to Powder Highlighter, Face, Foundation, Highlighter, Powder Foundation, Uncategorized

Cream To Powder Highlighter

cream to powder highlighter swatch finish

Cream to Powder Highlighter Guide: What It Is, Who It’s For, and How to Choose the Best One

Cream to powder highlighter is a hybrid formula that applies like a cream and sets into a soft powder finish. It blends easily onto the skin and transforms into a smooth, long-lasting glow without feeling sticky or heavy. This formula is great for people who want the ease of cream application with the staying power of a powder highlighter.

Common Cream-to-Powder Highlighter Questions Answered

What is cream-to-powder highlighter used for?

Cream-to-powder highlighter is used to give a soft glow that starts creamy and sets to a smooth powder finish.

Is cream-to-powder highlighter good for oily skin?

Yes — it sets down like a powder, making it ideal for oily skin types.

Does cream-to-powder highlighter work on dry skin?

Yes, but it works best when skin is well moisturized first.

Where do you apply cream-to-powder highlighter?

Apply to cheekbones, brow bone, nose bridge, and cupid’s bow.

Does cream-to-powder highlighter look natural?

Yes — it melts into skin and then sets for a smooth, soft-focus glow.

Do you need to set cream-to-powder highlighter?

Usually no — it self-sets into a powder finish.

Can beginners use cream-to-powder highlighter?

Yes — it is easy to apply and very low maintenance.

What tool is best for cream-to-powder highlighter?

Fingers or a dense brush work best for blending before it sets.

Most Searched Cream-to-Powder Highlighter Questions

Is cream-to-powder better than liquid highlighter?

It lasts longer and sets better, especially for oily skin.

Does cream-to-powder highlighter crease?

Rarely — it sets into a smooth powder finish.

Can you wear cream-to-powder highlighter every day?

Yes — it gives a natural, long-lasting glow.

How long does cream-to-powder highlighter last?

It typically lasts all day once set on the skin.

Cream-to-Powder Highlighter Application Steps

Step 1: Prep Your Skin

  • Apply moisturizer and foundation if needed

Step 2: Choose Your Shade

  • Select champagne, pearl, or golden tones
  • Match undertone for natural glow

Step 3: Apply Product

  • Dab or swipe lightly on high points
  • Work quickly before it sets

Step 4: Blend

  • Use fingers or brush
  • Blend edges before it sets to powder

Step 5: Build If Needed

  • Add layers for stronger glow
  • Blend immediately for smooth finish

Useful Cream-to-Powder Highlighter Tools

  • Fingers – warms and blends before setting
  • Dense Brush – smooth application and blending
  • Beauty Sponge – soft diffused glow

Cream-to-Powder Highlighter Tips & Guidance

Best by Skin Type ✨

  • Oily skin: Ideal long-wear finish
  • Dry skin: Prep with hydration first
  • Combination skin: Balanced natural glow
  • Sensitive skin: Lightweight formulas preferred

Common Mistakes ⚠️

  • Waiting too long to blend
  • Applying too much product
  • Skipping skin prep
  • Not blending edges quickly

Where to Apply 📍

  • Cheekbones
  • Brow bone
  • Nose bridge
  • Cupid’s bow

Finish Guide 🎯

Cream-to-powder highlighter gives a soft, smooth, semi-matte glow that sets beautifully on skin.

Cream-to-Powder Highlighter Coverage, Finish & Shade Guide

Glow Levels ✨

  • Soft: Natural sheen
  • Medium: Balanced glow
  • Intense: Defined highlight

Finish Types 💄

  • Soft powder – smooth blurred glow
  • Natural satin – subtle radiance

Best For ✔

  • Oily and combination skin
  • Long-wear makeup looks
  • Low-maintenance routines
  • Soft-focus glow finish

May Not Be Ideal If ⚠

  • You prefer ultra-dewy finishes
  • You want wet-look highlight

Shade Matching Tips 💡

  • Champagne suits most skin tones
  • Gold suits warm undertones
  • Pearl suits cool undertones

Still Deciding Which Highlighter Is Right for You?

Top Cream-to-Powder Highlighters to Try

Maybelline Master Chrome Cream-to-Powder Highlight

⭐ 4.6 / 5 from 50k+ reviews

Glow Level: Soft metallic glow Benefits: Creamy formula that sets to powder Why we love it: Affordable, long-lasting glow with smooth finish. Buy Now

MAC Extra Dimension Skinfinish

⭐ 4.8 / 5 from 60k+ reviews

Glow Level: High-impact luminous glow Benefits: Creamy-powder hybrid texture Why we love it: Iconic glow that lasts all day. Buy Now

NYX Wonder Stick Highlight Side

⭐ 4.5 / 5 from 35k+ reviews

Glow Level: Natural soft glow Benefits: Easy stick format, blendable formula Why we love it: Perfect for quick, everyday highlight. Buy Now

Clinique Chubby Stick Sculpting Highlight

⭐ 4.6 / 5 from 20k+ reviews

Glow Level: Soft radiant sheen Benefits: Skin-friendly creamy-to-powder finish Why we love it: Gentle, natural glow for sensitive skin. Buy Now
Powder foundation compact for matte, shine-free coverage
Face, Foundation, Powder Foundation, Uncategorized

Eye Shapes & Techniques

Eyeshadow Guide Hero

Eye Shapes & Techniques Guide

Understanding your eye shape helps you apply makeup more effectively by improving placement, enhancing symmetry, and creating more lifted, balanced eye looks.

Common Eye Shape Questions Answered

Why is eye shape important in makeup?

Eye shape helps determine the best placement for eyeshadow and eyeliner for balance and lift.

How do I know my eye shape?

Look at crease visibility, lid space, and outer corner direction in natural light.

Can makeup change your eye shape?

Makeup can’t physically change shape but can visually enhance or lift the eyes.

What eye shape is easiest for makeup?

Almond eyes are considered the most versatile for makeup application.

Do all eye shapes use the same eyeliner?

No — liner style changes depending on eye shape for best results.

Should eyeshadow placement change by eye shape?

Yes — placement affects lift, depth, and balance.

What is the most common eye shape?

Almond and round eye shapes are the most common.

Do hooded eyes need special techniques?

Yes — techniques that create visible lid space work best.

Most Searched Eye Shape Questions

What eye shape do I have?

It depends on crease depth, lid space, and outer corner angle.

How do I make my eyes look bigger?

Use light shades on lid and tightline eyeliner for lift.

What eyeliner suits almond eyes?

Most eyeliner styles suit almond eyes easily.

How do I lift droopy eyes?

Use upward winged liner and outer corner shading.

Eye Shape Application Techniques

Step 1: Identify Your Eye Shape

  • Check crease visibility
  • Observe outer corner direction

Step 2: Map Your Eye Area

  • Mark crease, lid, and brow bone
  • Identify focus areas for lift or depth

Step 3: Apply Base Products

  • Use eye primer for smooth base
  • Even out lid tone

Step 4: Apply Eyeshadow Strategically

  • Adjust placement based on eye shape
  • Blend upward for lift effect

Step 5: Apply Eyeliner for Shape

  • Use liner to enhance or lift eyes
  • Adjust thickness based on eye shape

Useful Eye Shape Tools

  • Blending Brushes – for shaping and depth
  • Eyeliner Pens – for precise shaping
  • Mirror with natural lighting – for accurate mapping

Eye Shape Tips & Guidance

Best Techniques by Eye Shape ✨

  • Hooded eyes: Higher crease placement
  • Round eyes: Elongated liner
  • Almond eyes: Balanced application
  • Downturned eyes: Upward lift focus

Common Mistakes ⚠️

  • Ignoring natural eye shape
  • Applying same technique to all eyes
  • Over-blending outer corner
  • Wrong eyeliner direction

Where to Focus 📍

  • Outer corner for lift
  • Center lid for openness
  • Inner corner for brightness

Finish Guide 🎯

Eye techniques enhance natural shape to create lifted, balanced, or elongated effects depending on placement.

Eye Shape Types & Technique Guide

Eye Shape Types ✨

  • Almond eyes
  • Round eyes
  • Hooded eyes
  • Monolid eyes
  • Downturned eyes

Best Technique Focus 💄

  • Lift – upward blending
  • Definition – crease shading
  • Elongation – winged liner

Best For ✔

  • Improving eye symmetry
  • Enhancing makeup precision
  • Creating lifted eye looks

May Not Be Ideal If ⚠

  • You prefer minimal makeup steps
  • You don’t use eye makeup techniques

Technique Tips 💡

  • Always blend upward
  • Follow natural lash line
  • Adjust liner per eye shape

Still Learning About Eye Shapes?

Explore makeup guides to improve eye techniques and styling.

Top Eye Makeup Tools

Sigma Eyeshadow Blending Brush

⭐ 4.8 / 5 from 90k+ reviews

Coverage:
Soft blending control

Benefits:
Smooth seamless transitions

Why we love it:
Perfect for shaping and blending eye looks.

Buy Now

Real Techniques Eye Brush Set

⭐ 4.7 / 5 from 120k+ reviews

Coverage:
Full eye makeup kit

Benefits:
Versatile for all eye shapes

Why we love it:
Great beginner-friendly brush set.

Buy Now

KVD Tattoo Liner Pen

⭐ 4.7 / 5 from 110k+ reviews

Coverage:
Precise eyeliner control

Benefits:
Sharp, long-lasting definition

Why we love it:
Ideal for shaping eyes with liner.

Buy Now

Urban Decay Eyeshadow Primer Potion

⭐ 4.8 / 5 from 150k+ reviews

Coverage:
Eye base primer

Benefits:
Prevents creasing and fading

Why we love it:
Essential for long-lasting eye looks.

Buy Now
Scroll to Top